Pages

Showing posts with label science. Show all posts

Monday, August 23, 2021

DNA extraction: Kiwi Fruit

"Snot Fishing" was given the term by our teacher, due to its nature and feel. In the experiment that we've completed, we were tasked with taking DNA from kiwi fruit. We--as a class- were shown an extraction of DNA using household items. The video shows removal of 

Aim: To extract DNA from kiwi fruit.


Equipment:

  • Kiwi fruit
  • Ziplock bag
  • Detergent
  • Salt
  • Rubbing Alcohol
  • Beaker
  • Test tube
  • Filter
  • Popsicle stick

Method: 

  1. Cut the kiwi fruit and peel, half is sufficient.
  2. Put the kiwi fruit inside of the ziplock bag and mush until there aren't many visible clumps.
  3. Take a pinch or two of salt and put it inside the ziplock bag.
  4. Pour a couple tablespoons of water inside the bag and incorporate. 
  5. Pour a few teaspoons of detergent inside the bag, mix, but not to an extent in which the mixture is bubbly.
  6. Filter the mixture in a beaker.
  7. Pour the filtered mixture/liquid into a testtube.
  8. Pour rubbing alcohol atop the mixture.
  9. In the middle of the alcohol and mixture the DNA lies, take a popsicle stick and "fish out" the DNA.


Tuesday, July 6, 2021

"Report to the Principal"

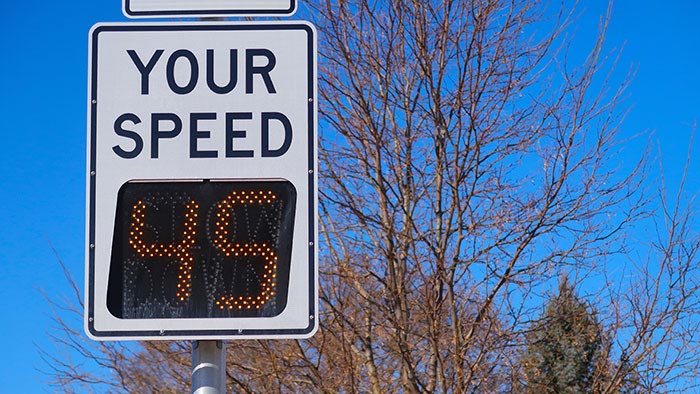
Aim: To see if there are any cars that drive above the set speed limit outside of school [HHS]

Method: 

  1. Measure the distance between 2 power poles = 50m 
  2. Time how long it takes a car to travel this distance.
  3. Collect 10 times.
  4. Calculate speed in m/s - convert to km/hr
  5. Are there any speeders?
Person/ s needed:
  • "Flag Person" indicates when a car passes their pole
  • "Timer Person" starts when a car passes their pole and stops when indicated by "Flag Person".
  • "Writer Person" writes down the times

Speed

Car 1

Car 2

Car 3

Car 4

Car 5

Car 6

Car 7

Car 8

Car 9

Car 10

Average

Time (s)

04.69

3.59

4.50

4.40

5.40

4.15

6.09

3.77

3.43

5.02

4.504

m s-1 

0.6

13.9

11.1

11.3

9.25

12

13.2

14.5

9.96

8.21

11.402

km hr-1 

38.1

50

39.90

33.3

43.2

29.5

47.5

52.2

35.8

40.9

46.01


Conclusion: With the speed limit of 50kmph there was a singular car in the 10 measured to have gone above the speed limit. Though the tolerance could perhaps not acknowledge such with only 2kmph above the set speed. Through the investigation, we have discovered that the average speed of a car going past the school is around 46.01kmph or simply 46kmph which is under the speed limit.  With the exception of 1, all were going at a relatively slow speed--in technicality, the vehicle which got 52 kmph was indeed speeding but not to an extent in which a worry would surface. Improving our measuring method could perhaps make the investigation more accurate, such as recording more vehicles and being more certain with the timing. Increasing the diversity of the cars could help this as well; bigger cars, older models, newer models and the likes. Using proper equipment will improve the individual accuracy of testing a car also. Other methods may include speed cameras, light detection, etc.

What happens at a speed awareness course? - Confused.com

Tuesday, May 4, 2021

Corrosion

Corrosion I

 Investigating Rusting:

Aim: To investing the factors that cause rusting in iron. 

Equipment:

  • Four test tubes
  • Test tube rack
  • Bung
  • Four iron nails
  • Boiled water
  • Tap water
  • Salty water
  • Cooking Oil
  • Calcium Chloride
 Method: 

  1. Label four test tubes and place in a test tube rack.
  2. Test tube contents:
  • B = Iron nail and tap water
  • C = Iron nail and salty water
  • D = Iron nail, boiled water and oil.
  • E = Iron nail and calcium chloride sealed with a bung.
      3. Leave the test tubes undisturbed for at least three days.

Test Tube

Conditions present or absent

Observations

E

Iron nail and calcium chloride sealed with a bungTest tube E with calcium chloride and bung showed no visible corrosion. Iron oxide didn't form to an extent in which is visible to the naked eye. It is the only test tube that showed no corrosion.

B

Iron nail and tap water

Iron nail and tap water showed the worse reaction. It was the most corroded out of all the test tubes that were experimented with. The iron oxide formed at the bottom of the test tube with a dark hue of orange.

C

Iron nail and salty waterThe salty water test tube was ever so slightly better with corrosion. Although a similar hue of orange was seen; dark iron oxide wasn't too visible.

D

Iron nail, boiled water and oil.The rusting was moderate. It wasn't the extent that the salty and tap water was. It was similar to the reaction of the zinc pellet. It was akin to its orange hue but was more yellow.

Hypothesis: The test tubes labelled A to C are expected to rust more than the later tubes. With C having significant visual effects rather than D to H. Though all of the nails may get rust the previously mentioned would gain more and will be more visible.

Corrosion II

Preventing Rusting:

Aim: To investigate a number of techniques that may prevent rusting.

Equipment:

  • Four test tubes
  • Test tube rack
  • Bung
  • Four iron nails
  • Boiled water
  • Tap water
  • Vaseline gel
  • Nail
  • Polish or paint
  • Zinc pellets or magnesium ribbon
  1. Label four test tubes and place in a test tube rack.
  2. Fill all test tubes with equal volumes of water - enough to cover the nails.
  3. Test tube contents:
  • A = Iron nail
  • F = Iron nail, water and vaseline
  • G = Iron nail and nail polish
  • H = Iron nail, zinc and water
      4. Leave the test tubes undisturbed for at least three days.


Test tube

Conditions present or absent

Observations

A

Iron nail

The iron nail rusted but only lightly, visible yet faint.

F

Iron nail, water and vaseline

Test tube F showed moderate rusting, covered by the vaseline--rusting was shown in the areas in which were more present in the water.

G

Iron nail and nail polish

G--showed significant rusting, the paint was eaten away and the iron corroded-- to an extent in which iron oxide coloured the tube with a hue of orange.

H

Iron nail, zinc and water

The rusting of the test tube H was only slightly rusted. The zinc pellet affected the rusting of the iron by a good margin.


Wednesday, March 31, 2021

Making Salts II

Aim: To produce copper sulfate salt by reacting copper dioxide with an acid.

Hypothesis: By mixing sulfuric acid and copper oxide, a neutralization reaction would occur. Copper sulfate and hydrogen would form.

Equipment:

  • Copper oxide powder
  • Dilute (0.5 mol L-1)
  • Sulfuric acid
  • 50mL measuring cylinder
  • 2 100mL beakers
  • Hot plate
  • Gauze mat
  • Funnel
  • Filter
  • Paper 
  • Thermometer
  • Spatula
  • Evaporating basin
  • Stirring rod

Method: 

  1. Add 20 mL of sulfuric acid to a 100 mL beaker. Heat the acid until it reaches 70°C. Turn off your bunsen burner (in our case the hot plate). 
  2. Once heated, use a spatula to add pea-sized portions of copper oxide to the beaker. Stir the mixture for 30 seconds.
  3. Repeat step 2 until no more will dissolve. Allow the beaker to cool. 
  4. Fold the filter paper and place it in the funnel. Place the filter funnel into the second beaker. 
  5. Make sure the beaker is cold enough to hold at the top. The contents should still be hot. You may need your teacher to complete this step. 
  6. Gently swirl the contents of the beaker to mix, and then pour into the filter paper in the funnel. Allow to filter through. 
  7. Rinse the beaker you used to heat the mixture previously, and place it back on top of your tripod filled with 50-60mL of water.
  8. Place the evaporating basin on top of the beaker and carefully pour some of the solution from the beaker into the evaporating basin. 
  9. Gently heat the beaker until the solution in the evaporating basin has reduced by half. 
  10. Leave the evaporating basin to cool. Once cool, move the evaporating basin to a warm place where it will not be disturbed (i.e. a window-sill) and observe over the next few days. Blue copper sulfate crystals should form. 

Observations: As the mixture heated the colour changed. The mixture of sulfuric acid and copper oxide turned the mixture into a murky substance. The clear liquid-sulfuric acid- add copper oxide turned dark blue--filtered--lighter blue. Gasses were released, as told dangerous gases, which can blind the eyes. And so proper caution was taken 

Name of the reaction occurring in step 2: The reaction is called neutralisation. 


Monday, March 29, 2021

Making Salts

Aim: The aim of the experiment is to produce sodium chloride salt by carrying out a neutralisation reaction.

Hypothesis: By balancing the mixture of acid and base [NaOH + HCl] we are able to reach neutralisation. Using the method of evaporation we should be able to create sodium chloride.

Equipment: The equipment is as follows:

  • 50 & 200ml beakers.
  • HCl
  • NaOH
  • 25ml measuring cylinder
  • Glass stirring rod
  • Spotting tile
  • Universal indicator solution
  • Hot plate
  • Gauze mat
  • Dropper

Method: 

  1. Using the measuring cylinder measure 10ml of HCl and pour it into your 50ml beaker. 
  2. Add dilute NaOH a few drops at a time while stirring with a glass rod. 
  3. Every 10-15 drops stop adding the NaOH and use glass stirring rod to transfer a drop of the solution spotting tile. Test its pH using Universal indicator.
  4. Keep adding NaOH and testing the solution by repeating step 3. As you get closer to neutral you may need to test the solution after every drop.
  5. Pour the neutral solution into an evaporation basin (in our case a different beaker) and evaporate the water from the solution using the equipment shown above.
Observation:  
The colours change from the warm colours[reds] to the colder colours--specifically violet. Though through addition and getting closer to neutralisation the colours such as yellow, orange, lime as starting with an acid. However, if started with the base it would then [as it gets closer to neutralisation] turns indigo, blue, sky blue to green. 

Word Equation:
Acid + Base --------> Salt + H2O   
or
NaOH + HCl -------> NaCl + H2


Tuesday, February 16, 2021

Physical or Chemical Change (heating ZnO)

Hypothesis: I theorize that the change will be physical, it will have heat but will remain as a physical change.

\


Equipment: 

  • Sample of ZnO (Zinc Oxide)
  • Heat source - Hot plate
  • Scales
  • Heat proof container - Evaporating dish
  • Tongs
  • Heat proof change


Method:

  1. Get sample of ZnO in an evaporating dish.
  2. Weigh the ZnO + container - record the weight.
  3. heat container + ZnO on hot plate.
  4. Observe any changes - use phone for before + after photos (video?)
  5. Take off heat + put on heat proof mat.
  6. Let cool - observe - photos
  7. Re-weigh


Results: What? - Write your description

When the ZnO was heated, initially there wasn't a visible change. However after a few minutes there were signs of change by means of colour. The white powder began to change into a pinkish colour into which after a few moments more changed into yellow. When the compound was weighted before putting it in the heat, with the dish it weighed 57g (ZnO solely was 2g) which was the same as when the experiment was over. After cooling the compound changed back to its initial colour.


Conclusion: Explain the results - connect to the Hypothesis

In conclusion to the experiment the  Hypothesis that I have theorised was indeed correct. Although the change of colour was indeed a sign of chemical change, there were other factors into which point onto the other option. Examples of physical changes that it showed are as follows; weight was the same, it was "reversible" per se, as it reverted to the original colour and finally, no other compound was created during teh process.

Friday, November 27, 2020

Digestive System - Hurumanu 2

 In this subject, we are to look at the digestive system of the body. Starting from the ingestion, from the mouth, teeth and saliva up the exit which is the anus. We look first at the teeth, with types such as the incisors, molars and canines. With that lesson as well we look at the type of animals that uses such types of teeth, at least primarily. Aside from that, we look at the organs in which we use to digest and absorb our foods. In combined with that we look at not only how we digest, ingest and egest but also nutritional needs of our bodies that are needed for us to survive. However, what we have created a DLO about are only the digestive system containing the organs, as well as the teeth.


Sunday, October 18, 2020

Hurumanu 2 Science - Arthritis

 In our science, Hurumanu 2 we have begun to look at the human body. This includes the skeleton, bones, muscles, circulatory system, blood, etc. Lately, we also began to look at a disease that could affect parts of the human body, that is Arthritis. A 'group' of diseases that affects the joints, including a type that was represented as an attacking demon. Gout is an intense pain that is under the types of arthritis, describes as and extreme pain that is said to put your foot on fire. In the task, we are to look at the two most common types, cause, treatment as well as risks.  I have completed so by creating a poster to showed what I have gathered. 


Tuesday, August 18, 2020

Lemon Batteries

 Aim: To produce an electrical current using Lemons.

Material:

  • Lemon
  • Copper electrode
  • Zinc electrode
  • Copper wire
  • Voltmeter
Steps:
  1. Roll lemon to soften the inside. 
  2. Insert the copper at a reasonable depth in the lemon.
  3. Insert the zinc electrode, nail, piece in the lemon, similar to the copper.
  4. Connect the voltmeter to the wires.
  5. Connect the wires to the copper and zinc plates, nails, wire, onto the voltmeter.
Findings: 
1 lemon = 1v
2 lemon = 1.8v
3 lemon = 2v

Volt changes, when the arrangement of the placement where the copper and zinc is put in.


Thursday, June 4, 2020

Hurumanu 5: Science

This week, in Hurumanu 5, science. We continued to learn further about energy, in this we learn the many different types of energy. What kinds of energy can we see? Some notable examples that we use and see every day, is light energy, which enables us to see, energy--specifically light from the sun. Kinetic energy the energy released when we do any movement, walking, sprinting, running, throwing are all releasing kinetic energy. Energy is all around us, it only takes a small observation to see and realize the many types of energy that are present.

Link- PDF

Thursday, May 21, 2020

Science: Lab Safety

In this hurumanu, we are beginning to at last starting to learn. However, like other subjects and the previous learning about the science we first need to review how much danger lab could pose. We have now begun to look at safety that for our own benefit as well as for the benefit of others in this class. The rules of the lab were mostly created by us, which uses taht lab, though there are some exceptions. The rules as mentioned are to keep us away from harm, to take there are many hazards in the laboratory and thus we need these rules for our safety.

In this class, we have also started into looking at some words that we need to know about which are the following:

Safety: To protect yourself and or others from harm and danger.

Hazardous: When an object can be dangerous to you or has the potential to harm you.

Meniscus: The curved side of a liquid when it is in a container, or surrounded by solid.

Rules:

  1. Put your bags under your desks.
  2. Do not run inside the laboratory.
  3. Do not play with the equipment.
  4. Wear safety glass when are in an experiment that includes fire.
  5. Do not eat and or drink in a lab.

Monday, February 17, 2020

Eperiments- Dissolving: Hurrumanu 4


Template for a scientific report 
In Science, whenever we do an experiment we will blog it. The way that we blog an experiment is in the form of a scientific report.
Aim: To find out and see if salt or baking soda dissolve more.

Hypothesis: My hypothesis is that baking soda will dissolve less and will saturate the water much quicker as it is more finely that the salt, therefore, the salt will dissolve more on a faster rate.

Equipment: The equipment that we will be using for this experiment are: 250ml beaker,  100ml measuring cylinder, salt, baking soda, a stirring road, a teaspoon and a ruler.

Method: The following steps are what we will take for this experiment to work:
  1. We fill our beaker with 100ml of tap water.
  2. After the beaker has been filled, we then add a level teaspoon of our baking soda. A level teaspoon can be achieved by taking a teaspoon of the baking soda and a ruler is then run across its edge.
  3. The solution that we have mixed is then stirred, keep the rotation going until all of the baking soda has vanished and dissolved.
  4. Steps 2 and 3 are then repeated, it is only after that our solution has saturated and no more baking soda can be added.
  5. The number of teaspoons of baking soda is then recorded.
  6. The process that we have taken is then repeated for the salt as well.

Results: What did you observe? Either a picture or table of data.

Solute:SaltBaking Soda
Number of scoops (science spatula) till saturated:2011

Discussion: What do your results mean? Explain your results.
The number of scoops that we incorporated with our water and our solutes; saturating the water with salt was our first experiment and the first observation. The following was the Baking soda which dissolved less and saturated our liquid much slower. The number of scoops of salt that we were able to dissolve in our liquid was 20 scoops--science spatula--instead of a teaspoon; the number of scoops again with the same spatula was much less--11. In the experiment, we have observed that salt was much less fine than the baking soda; which is more chalky and more of a powder texture. It caused the water molecules to be filled up at a much faster rate, and that is why it requires less baking soda for the water to be saturated rather than the salt.

Conclusion: Did your experiment work? Was your hypothesis correct?
In conclusion, salt which somehow dissolves at a faster rate has a better or is better at solubility, it dissolves better than baking soda. We observed and conclude from this experiment that salt dissolves better than baking soda, making our hypothesis correct. Which stated that baking soda will dissolve less.


Conclusion:
I thought it would be a black crystal but it was bright blue and needed a couple of days to form but a very successful experiment!

Thursday, August 15, 2019

Carbon Foot-print


My Investigation

Aim: To look at how I can prevent climate change in the future.

1. Complete the activity 'Ecological Handprint'.


2. Complete the activity 'Carbon Footprint'.


3. Write down your 10 changes to climate change below. Using ideas from the Ecological Handprint and Carbon Footprint list 10 changes that you can make to stop Climate change?

  1.   Eat less meat.
  2.   Compost and recycle.
  3.   Shop as little as I can and think about my choices.
  4.  Try to use less fossil-fueled vehicles.
  5.  Use light efficient lightbulbs and turn things off hen I get the chance.
  6.  Garden and use what I have grown for consumption.
  7.  Turn lights and electronics off when not used.
  8.  Save water and conserve.
  9.   Conserve energy and use energy-efficient objects.
  10.  Plant trees or small plants where I can.  

The Years of Living Dangerously (Film, 59 min.)